To begin with, let me just clarify what I mean with the term “platform”. Here I am referring to a raised horizontal surface, not some computer science related environment. 🙂
Now that is done, let me proceed. I had a platform in my room for the last 4 years. I used the platform as my bed, and the normal bed in my room as a couch. This offered me two benefits.
- Extra space in the room since I did not need to buy and use the space for an other couch
- Awesome big bed with an awesome mattress and awesome blanket
The dimensions of the platform allowed me to buy a big mattress, in contrast to the 200 cm by 90 cm mattress that was present in the room already; and allowed me to use the area under the platform as a lounge area as well as a storage area during different times.
For an idea, have a look in the following picture:
Here I used the area under the bed as a pantry. Another example can be seen below:
Now that you know how awesome platforms are, I’ll tell you some tips on how to make them easily and quickly.
First…
THINGS YOU NEED:
Wood.. Loads of it… preferably cut to required dimensions
Electric screw driver
Screws
L shaped metal brackets
I shaped metal brackets
Once you have all this, life would be very easy. All you have to do it put the wood together, and screw in the connection pieces using the screws and the screw driver. Estimates time: 1 hour.
Life becomes a lot more difficult if you have to cut the wood though. This is why I would suggest getting it cut from the store you buy it from (I know Toom and V-Baumart in Germany do it for you for free). The thickness of the wood needed would depend on the quality of the wood. I would suggest getting 8 cm by 8 cm wood pieces for a room sized platform, and 6 cm by 6 cm or 8 cm by 4 cm pieces if you are just building the bed. When in doubt, consult personnel in the wood store. 🙂
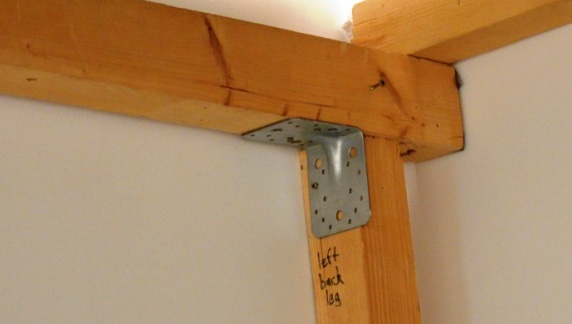
Also, make sure the brackets you buy are VERY strong. The inherent stability of the structure comes from the wood you will use, but these brackets will make sure the platform is solid. And just so you know what I am referring to, check the out the pics hyper-linked above.
You can also use some fancy screws as I did with the platforms of my friends, however, in retrospect they make the structure less versatile. However, if you don’t plan on taking the said platform down for a few years, the fancy screws are much much better. I used these to join the beams on the platform with the support legs. For this to be stable, for a wood piece of 8cm by 8cm, I used screws of length of at least 18 cm. I used these to screw the beams which did not have support legs underneath. In this case, for wood piece of 8cm by 8cm, you will need at least 17 cm long screws.
However, you can also just use screws and brackets to attach the wooden pieces together.
Now…
Lets Begin:
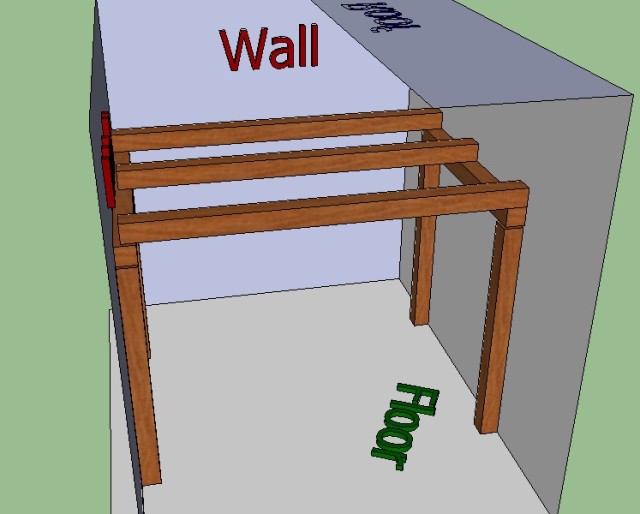
Okay. So the platform is basically a table. Think of it as such and life becomes easy.
To start of with, build the following structure using three pieces of wood. Attached them together using the I shaped brackets at location marked with black circle, and using L shaped brackets at locations marked red.
Do the exact same thing for the other side of the room as well. You will hopefully end up with something like this:
If your platform is very big, it might be worth putting additional support legs on each side as shown by the black oval. The platforms you will see in video below was about 2.5 meters wide and was stable with only support legs on each side.
Now that we have the sides ready, we can make the basic framework of the platform. This is done by joining these two supports by a beam going across them on each side of the support, as shown in figure below:
The area marked in yellow is where I used this screw. The screw ends up going through two layers of wood and into the support leg. However, this requires a drill as well as loads of power and patience. With little loss of stability, these beams can be joined using brackets as well.
Once the basic framework is done, the next step is to add additional beams in the centre. These are very important, as they would allow make the surface of the platform more rigid, as well as allow the boards on the platform to be nailed fixed. You will have something like this:
The area marked in orange is where I used these. They went through two layers of wood, and was screwed at the bottom. If you have an additional support leg below this beam, you would have to use these instead. Again, you can also just use L shaped brackets here to secure the wood.
Now that the main structure of the platform is done, comes the simplest and the easiest part: putting up boards on the platform. Anything above 8 mm of thickness is pretty good, however make sure they have groves on each side so they can slot into each other. This will make them fit together better, as well as make them hard to move accidentally.
However, they would still be able to move unless you screw them in. Just one screw per board per beam should be enough. 🙂
You will get something like this:
And there you go: the platform is ready. You can dress it up as you wish. 🙂
 And now, special treat: Dismantling of my platform (only brackets and screws), and the building of the Alex’s platform (some fancy screws, though if you look closely, we put in brackets on one of the beams since the hole for the fancy screw did not align and we didn’t have a drill):


